Happy Sunday everyone!
I hope you’re having a great weekend and gearing up for another awesome week! All I can say is that, it’s been a while since I last posted on Weekend Mani, and unfortunately, this weekend would be its last, until further notice.
The other day, I had to give up practically all my collection (apart form the ones I simply adored or given by friends, which I’ve decided to keep) and now have at least 6 colours left! Trust me, it was a hard decision to let them all go! But… that’s more reason to get new, exciting, or trendy colors right? As they say, make room for new ones. hehe.
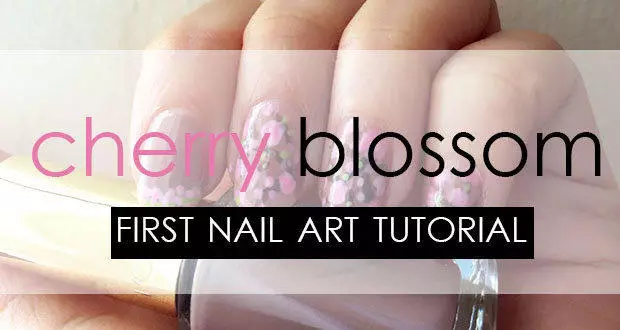
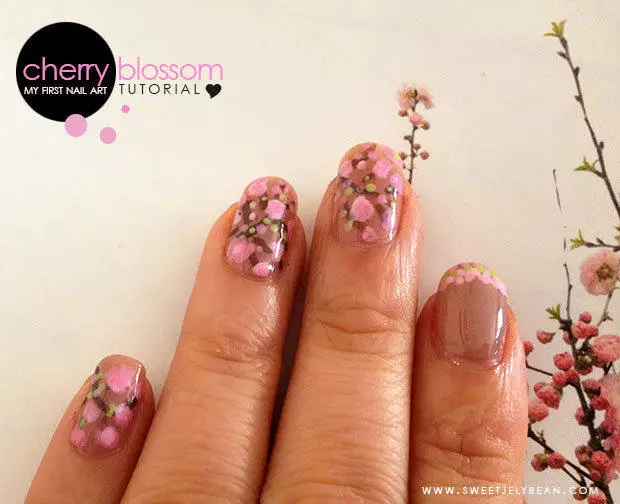
And since this is my last Weekend Mani installation, I thought of finally sharing my first Cherry Blossom nail art with a simple tutorial. I’ve been meaning to share this during the Spring season but have no idea how this slipped my mind. I guess, I was saving it for this weekend?
I’m not the best nail artist, that I can admit, but I’ve taken a liking towards cute designs I’ve been seeing all over the blogosphere and for this one, I got the inspiration from a magazine (as you will see in the pic). I hope you’ll like it!
Products used for my Cherry Blossom Nail Art Tutorial
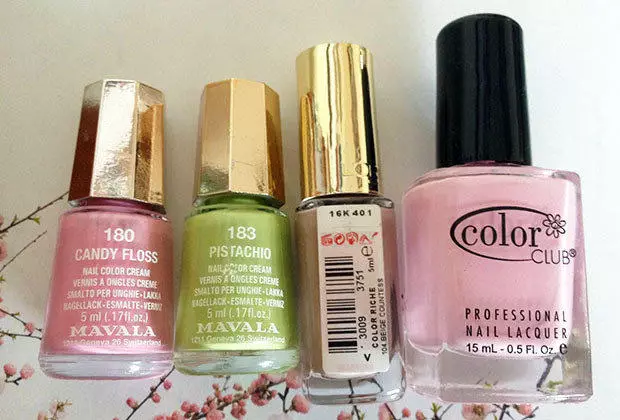
I’ve always loved Mavala’s Delicious Collection and I was so happy to be able to use them in this nail art.
Always remember to apply your base coat, and top coat to finish off your design.
Are you ready?
Cherry Blossom Nail Art Tutorial
Note: Here’s the thing about nail art designs, you can put your own little twist to suit your preference. It might not look identical based on the tutorial you’ve seen, but the good news is, that’s what makes it special.
It becomes your own. Enjoy!
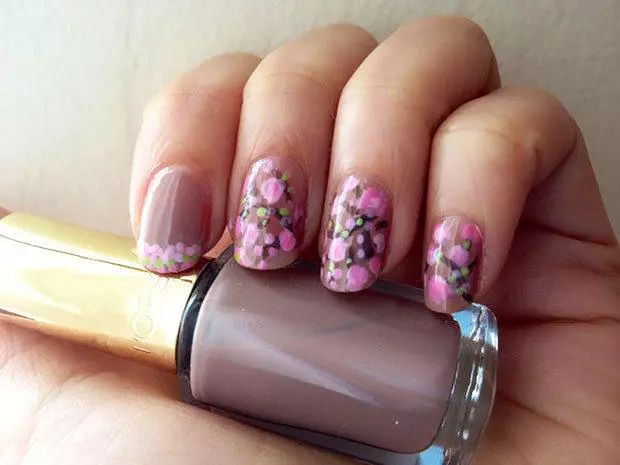
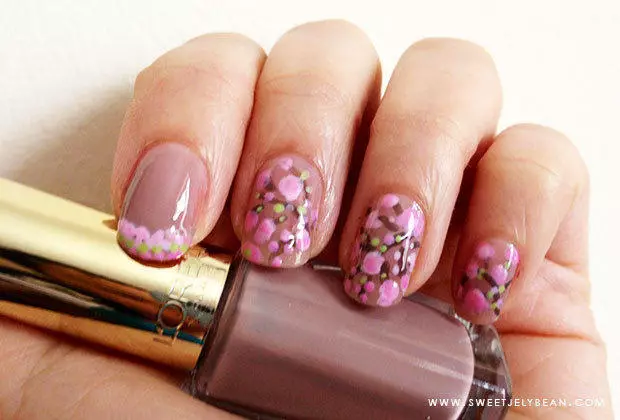
- Apply your base coat and then your base colour. L’Oreal 104 Beige Countess was the only colour I had at that point that was good enough to act as the canvas for this design.
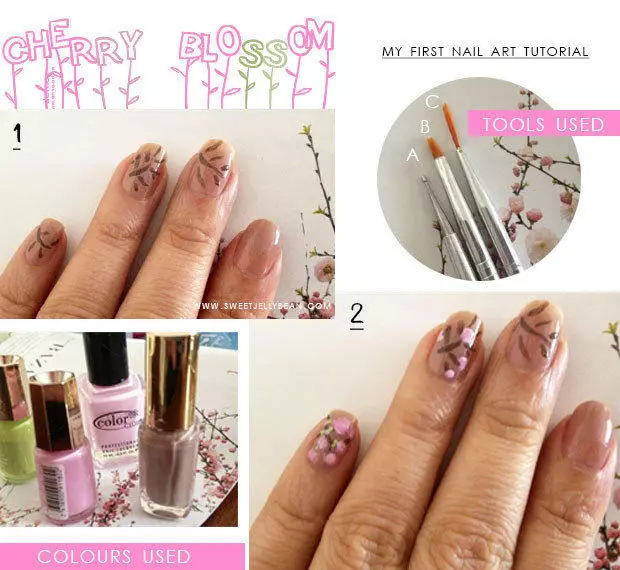
- Then, I used tool C to create the twigs (as shown in Frame 1). You can design the twigs differently or even draw it as if they’re connected on a branch. P.S. I always have an accent nail 🙂
- Looking at my ring finger (shown in Frame 2), I used tool B to dab around Color Club’s Endless (pink) and then layered it with Mavala’s Candy Floss (a shade darker than Endless) using the same tool to create a two-toned effect. For the flower bud effect, you can use the dotting tool (tool A). I’ve also used the same tool on my pinky using Mavala Pistachio (green) as the leaves sprouts.
- And you just recreate the same pattern as you go along. You can add more cherry blossoms dotted around or just a few if you prefer. I went a little bit overboard on mine, I think. LOL.
And voila! You’re done. That wasn’t too bad, was it?
What do you think?
Q: Are you ready for your very own cherry blossom nail art? What’s favourite nail art that you keep going back to?
