Watermarking or branding your photos is something a blogger should consider. Not only does it make your work more professional, it also prevent others from ‘stealing’ your work without giving you a proper credit. Giving credit when it’s due is one of the golden rules in blogging.
Pixlr Express does have ‘siblings’. 😛 You could say that the other one is more fun – Pixlr-o-matic, while the other is more advanced, Pixlr Editor.
To a degree, Pixlr Editor looks a little like Photoshop. But wait…. it doesn’t mean it’s scary! I believe that once you get to know the basic tools there, you’re good to go!
While I was writing this post, I also came across this excellent article that pretty much explain why you should ‘brand or watermark your photos’.
Based on what I’ve seen, most bloggers brand their images or photos, rather than watermarking them. Watermark tends to cover or blend in with the image, while ‘branding’ is what you’ll see either on the bottom left or right hand side of the image. And that’s what we’re going to do here, while at the same time, familiarize this new editing site.
Killing two birds with one stone, I’d say.
Important: Please note that this is a beginner’s tutorial on a FREE editing site Pixlr and I am fully aware that you can batch your photos and watermark them that way via Photoshop or other clients online (but you have to pay extra for it!).
1. Getting Started
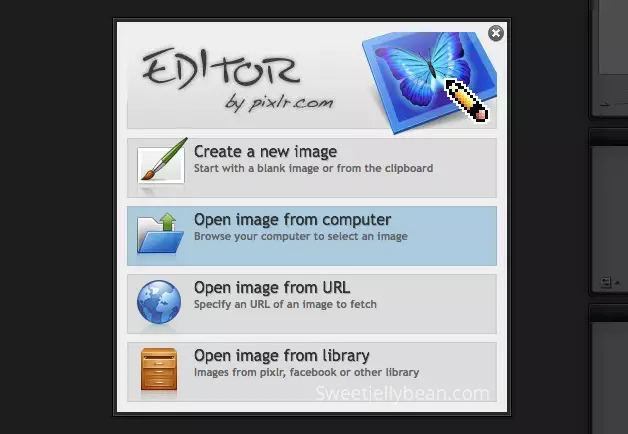
Go to www.pixlr.com/editor
Note: Click on images below for better viewing.
If you’re branding your own image, then click Open image from computer as shown above, otherwise click the other options that’s appropriate.
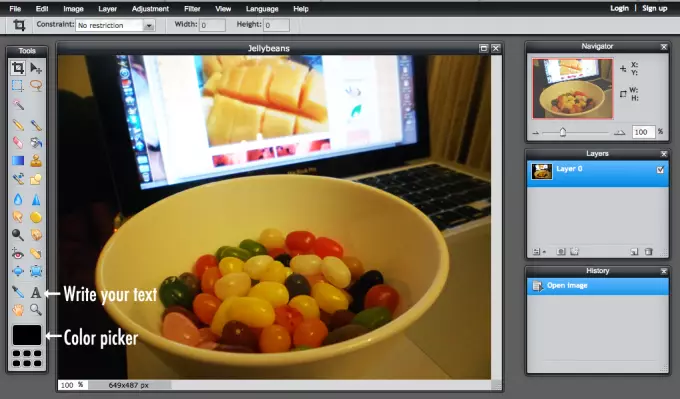
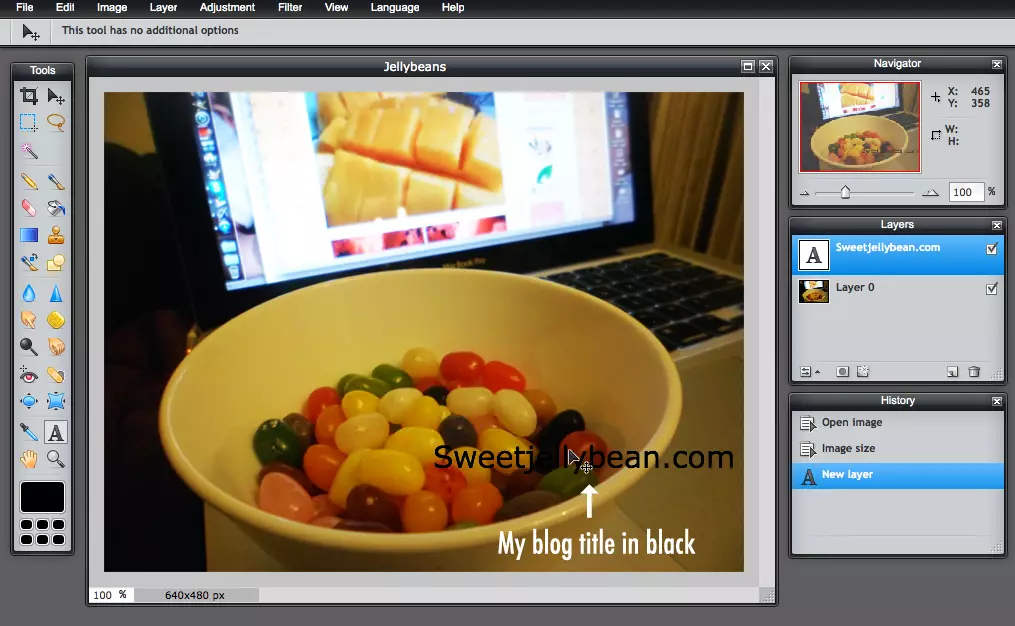
Let’s get to know the basic tools that would help us brand our image or work. Also on the right, you’ll see 3 Panels:
- Navigator – gives you the option to Zoom In or Out your Image , whichever is convenient for you.
- Layers – tells you what’s currently on your screen and let’s you edit your work by clicking on the layer you want to edit.
- History – tells you the actions you’ve done on your Image so far, and when click, you can Undo or Redo the action.
Layer 0 – refers to the Image.
If you want to Resize your Image to a desired width and height for your blog, you can do so by clicking Image then choose Image Size.
To continue…
2. Adding Text…
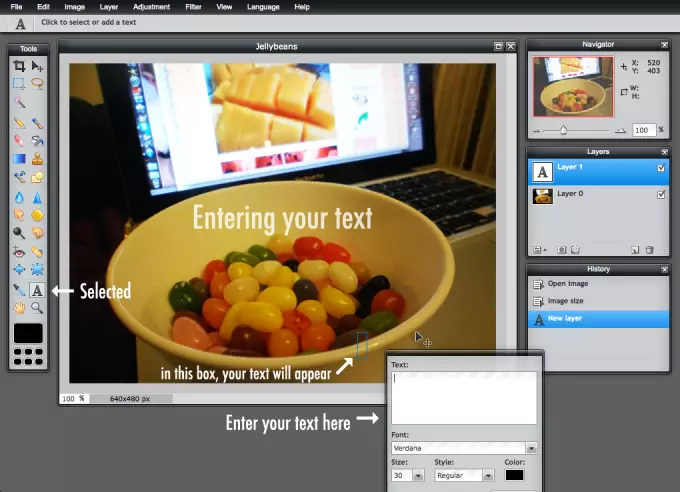
Select the ‘A’ icon and then click anywhere on the Image. The Text box will then pop up (as shown) and then the small rectangular box will also appear on the Image. Once you start typing on the Text box, this texts will appear in the rectangular box.
Important: Notice that on the Layers’ panel, another layer has appeared? The new layer with the ‘A’ icon above Layer 0, is your Text Layer.
Once you’ve added your text, the ‘A’ in the Layers panel will now contain whatever you’ve written. In this case, Sweetjellybean.com. You can technically change the label on the Layers panel, say put Blog Title instead, and it won’t affect on what’s written on the Image right now.
If you want to Edit your Text , make sure that Layer ‘A’ Sweetjellybean.com is highlighted as shown, and then click on the text itself on the Image to proceed with editing.
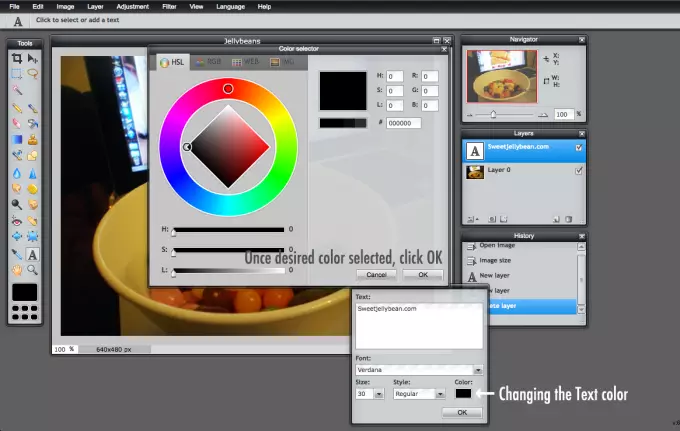
Changing the Text color is pretty simple, too. Shown above.
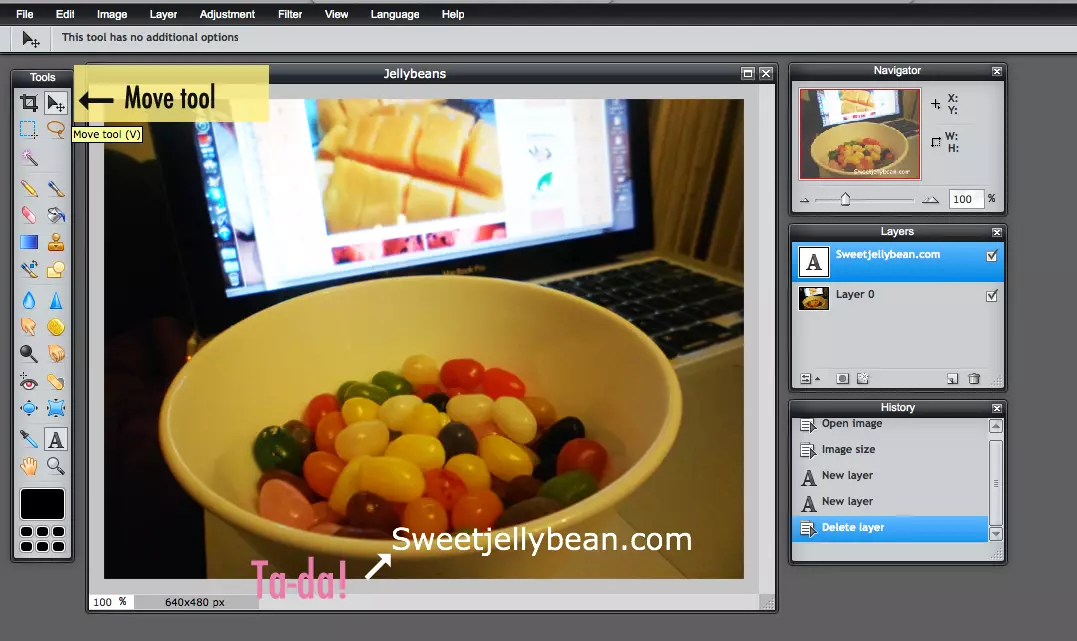
Now that we’ve changed Text’s color, another way of moving this ‘branding’ to a desired location is to use the Move tool.
Again, by selecting the icon, you can click and drag the Text (Sweetjellybean.com) shown on the Image.
3. Reducing Opacity or Transparency
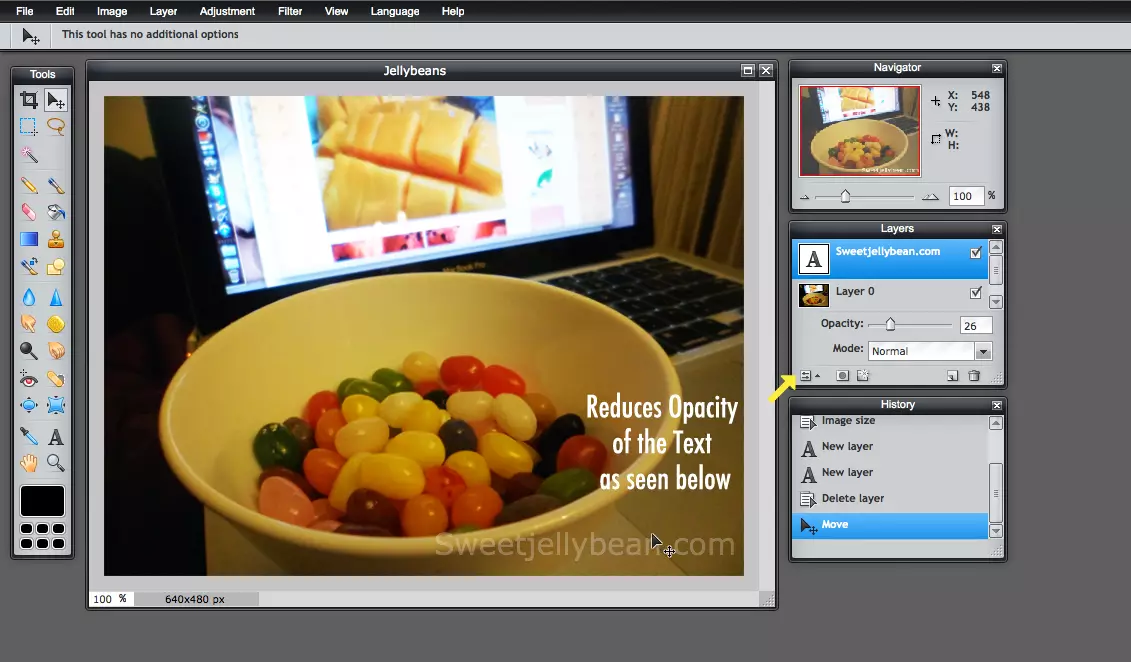
Since we don’t want this ‘branding’ to get in the way and take your readers attention away from the Image, you can reduce its Opacity or Transparency, see above.
4. Save!
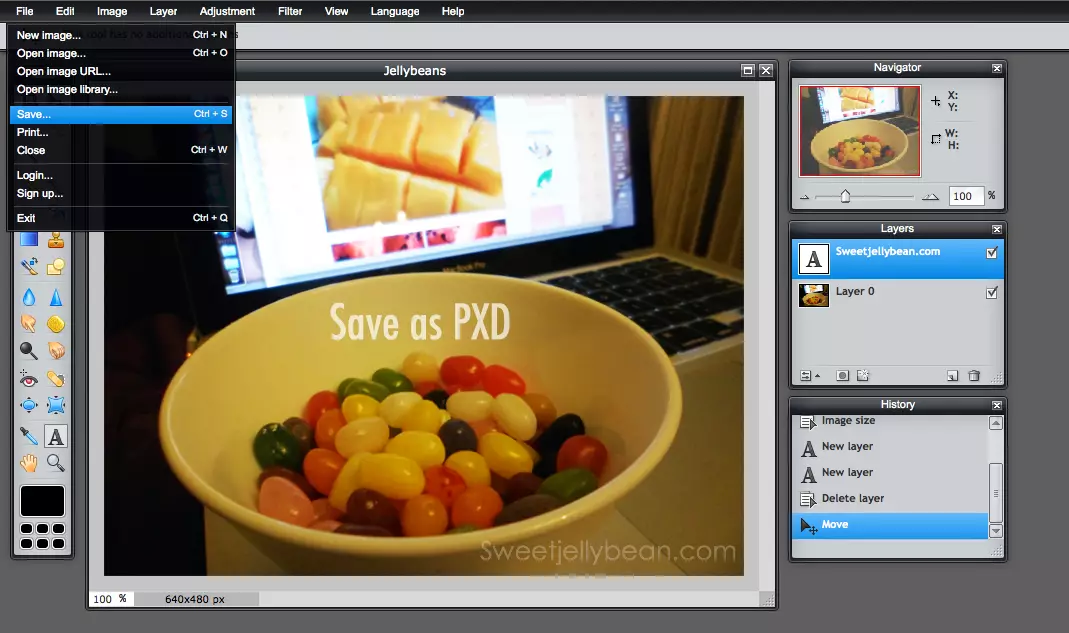
Now that you’re a happy bunny with your ‘branding’ it’s time to save this Image!
What I like about Pixlr Editor is that you’re able to save this Image as .pxd. and also save it as .png.webp or .jpg.webp to use on your blog, whereas the .pxd file option is not available on Pixlr Express.
Pxd files are editable via Pixlr Editor, so you wouldn’t have to start from scratch if you want to alter something , or reposition the ‘branding’. And that’s what’s good about Layers, something Pixlr Express doesn’t have.
So that’s how the cookie crumbles…
Want to know more on how easy to copy your ‘branding’ to the next image without having to do it all over again?
Go to Page 2.
